Labels

Monday, February 8, 2016

Added Raspberry Pi Cluster for Experimenting

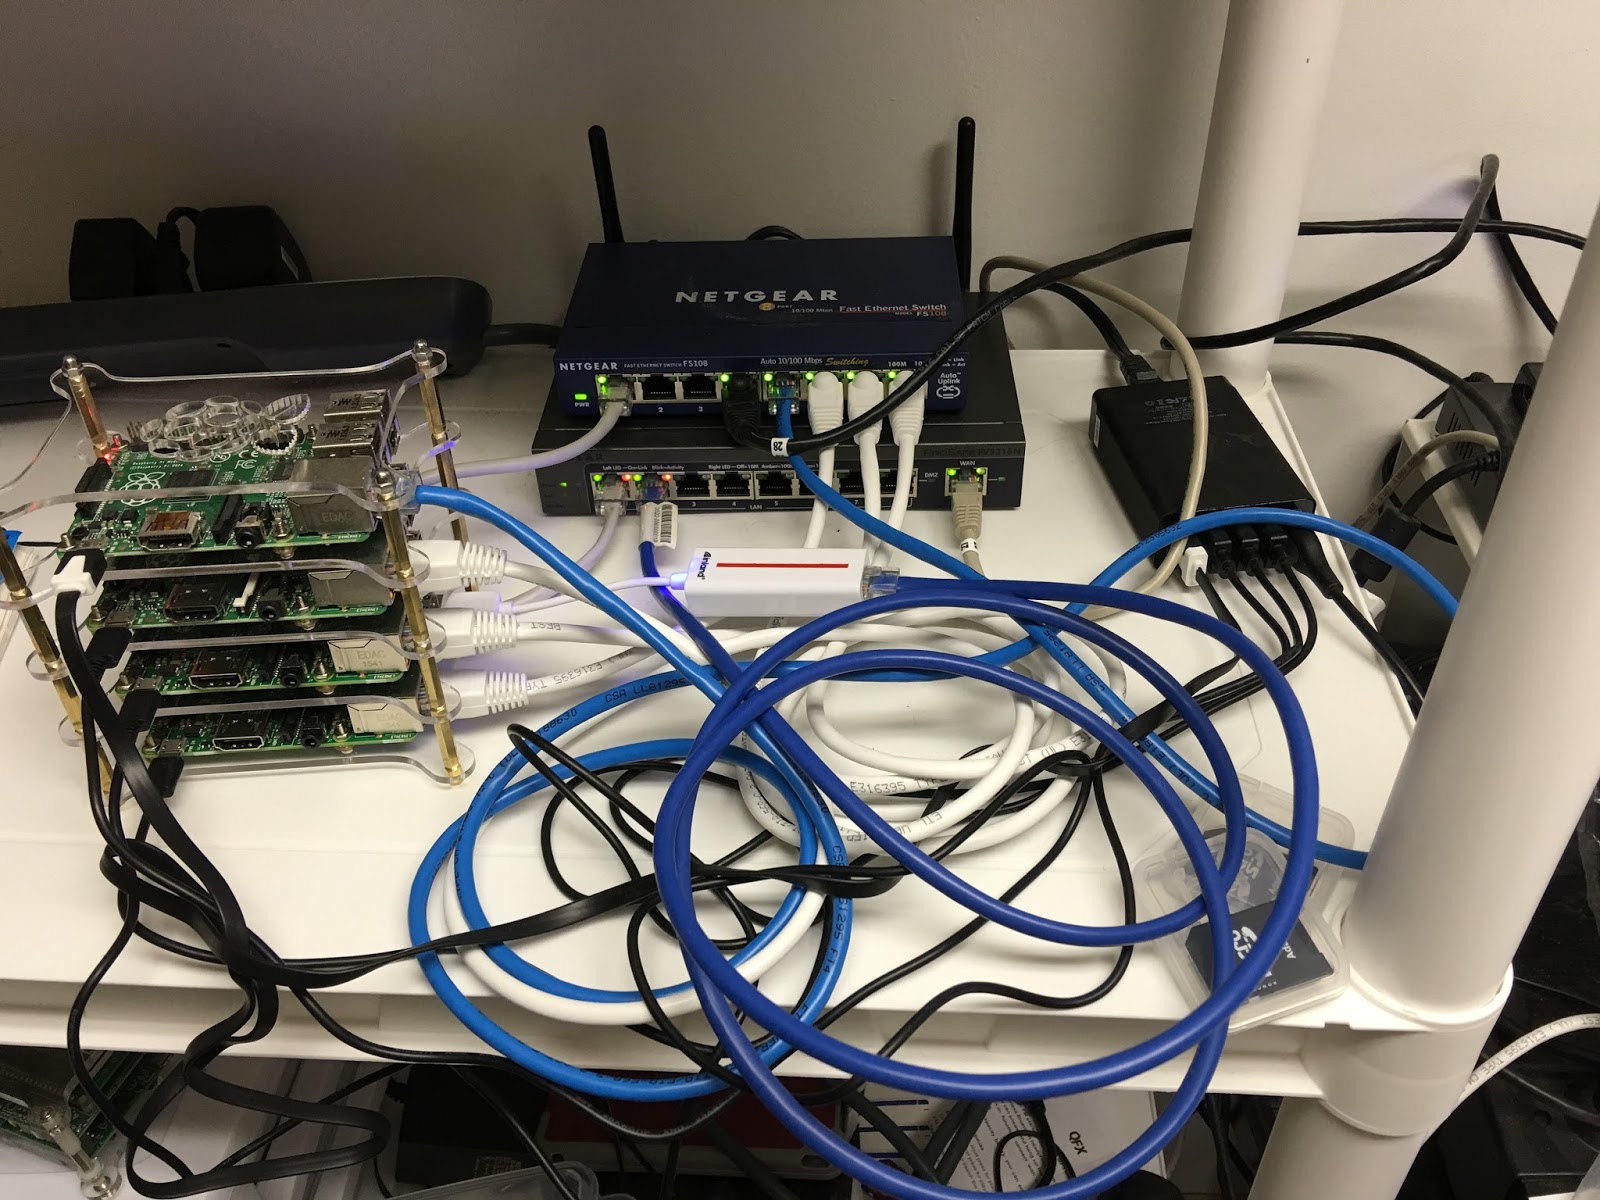
I just added a Raspberry Pi Cluster (4 RPis) to experiment with BGP and IPSec VPNs.  My thought was to have a No-Mans Land VLAN running through the house in which I could tap into with the cluster.  Since the NML vlan traffic wouldn't touch any of the other vlans it would make it easy to try out different types of routing protocols.  I could also use one of the RPis to act as an IPSec VPN server to connect from the outside to the NML vlan.  I could set it up so that it might be on a DMZ or other path.  I am therefore not constrained even though I have double routers in my network.  The cluster can be seen in this picture taken this morning:


When I was putting this together I was running some tests on a bench with the following layout:


I moved the cluster and router (acting as an 8 port managed switch) to an area where I have a UPS so that the power would be filtered.  The first item on the list is to get a reasonable IPSec VPN running, hopefully using StrongSwan with some decent encryption, say AES256.  Since the router has a WAN port, I can use that any time that I need to update the RPis in the cluster - just add a wire and then take it away.  I did discover one issue though, I am going to have to remove the Mac Mini from the NML vlan because I noticed that all of the ports that were open on my personal vlan were open on the NML vlan.  I don't know how to correct that so for now, after I get the IPSec VPN setup, I will remove the Mac Mini so I can reduce the probability that someone will hack into my network.

Saturday, January 23, 2016

TravelRouter#2 - Updated to Routed Client Mode using LuCI

I was pretty pleased with how easy it was to put the GL.iNet 6416a into a Routed Client Mode using LuCI (generic instructions are here).  The basic connection was through an Ethernet cable from my laptop to the router plugged into the LAN port.  The full-up connection is shown in the image:


In the expedience of time I will explain the process in the following paragraphs.

(1) connect the router via an Ethernet plugged into the LAN port and the other end placed into a USB to Ethernet adapter on the laptop.

(2) disconnect the laptop from all Ethernet connections except for the router connection.

(3) log into the router with credentials using your browser; select Network -> WiFi.

(4) click on the Scan button next to the "Generic MAC80211 802.11bgn (radio0)" line.  Select the WiFi network that you wish to join by clicking on the "Join Network" button.

(5) leave "Replace Wireless Configuration" checked, this will ensure that everything is replaced.  Enter the wpa2 passphrase.  Make sure that WAN is selected; this will ensure that the wireless setup is associated with the WAN connection on the router.  Select save.

(6) When the next screen comes up, make sure that WAN is selected.  Click on Save and Apply.

(7) At the next screen you should see the selected WiFi under the "Generic..." line.  Next, click on the Add button next to the "Generic..." line.  Select LAN to associate with this new WiFi SSID.  Change the name from"OpenWRT" if you desire a different SSID for your LAN network connection.

(8) select Wireless Security tab to setup the WPA2 data.  Select WPA2-PSK for encryption and "Force TKIP and CCMP (AES)" from the dropdown next to Cipher.  Add the passphrase as necessary.  Click on Save and Apply.  This will bring you back to the screen with the "Generic..." line.  You should see both the SSID of the WiFi you are connected to on the WAN side, and the SSID for the LAN side.  At this point you are set up.

That is pretty easy setup for OpenWRT.  Next, I got to figure out a couple of different setups including one with OpenVPN back to my house.

Friday, January 15, 2016

TravelRouter #1 - I Bought a GL-iNet 6426A Travel Router

After some looking around, I ended up buying a GL-iNet 6416A Travel Router from Amazon for $24.  What intrigued me about this router was the (1) OpenWRT based system and (2) the ability to reflash it with a new version of OpenWRT if I wanted.  So the first thing that I did after getting the router was to reflash it (instructions here) with the latest Chaos Calmer version.  This eliminated the tweeks that the company had placed on the router, but I wanted to customize my own.  BTW, the company provided a very nice suite of abilities for the novice.  This router was also the basis for the nefarious TOR routers that showed up on kickstarter a couple of years ago.  Those routers were tossed because they claimed original prototypes and manufacturing when in fact they were just repackaging the GL-iNet 6416A.  The following is an image of the router from rednerd.com (his site has a very good description of how to add TOR to this router).


I also immediately set the system to allow ssh connections on the LAN side.  The next tweek was to update the software listings and setup LuCI for web interface.  I did that through ssh (instructions here).  I next setup the router with my own SSID and WPA2 password (without enabling the wireless).  The interface allowed me to choose between putting the wireless on the LAN or the WAN side of things, I chose LAN.  After all that, it would appear that I have about 11.95 MB more space for software.  That means that I can do a lot with it.

My main thought is to setup some standard configurations with some kind of selection through the web interface to easily set the router to what I want.  That may take some doing.  More Later.

Monday, January 11, 2016

Cluster#1 - 802.1q at L2 Along with Routing at L3 in the 1-Port Router

Ok, I am still playing around here with routing and 802.1q.  My latest endeavor is using Quagga along with shorewall to produce some useful home appliances.  Unfortunately, this is all going to be running at a 100MHz clip on Ethernet rather than the nice 1GHz Ethernet lines I have running through the house.  However, I get to play with the outcome.

When I last broached the subject here, I had added the 802.1q capability to the RPi Raspbian load.  I have since been adding a number of RPis, without a clear purpose to what I would do with them.  I now have a quad RPi cluster (shown in the image above) that I can use for some of the networking experiments.  The latest experiment is to setup each RPi in the cluster with a Quagga and shorewall routing load.  Shorewall is primarily a firewall, but with some alterations to the definition files, it will serve its purpose as a router capability.  The Quagga software allows me to experiment with OSPF and BGP routing protocols, the idea being that I can simply configure them and drop them into my network at home at any place and the routing tables will automatically be built for me.

My idea is to use the normal Ethernet interface to the RPi as the connection point to the other Quagga/shorewall RPis on a separate no-mans land VLAN.  I would then use 802.1q to trunk my way into VLAN switches which would then distribute the information as necessary.  I can also modify the way that I am connecting and actually have a VLAN switch capability on an RPi with attached USB hub running to USB-to-Ethernet adapters, each "port" having a trunk line or untagged port.  This of course gets somewhat expensive since the cheapest I can find those adapters is $6.99 at amazon.  I wish that I could find an Ethernet switch adapter that would allow me to experiment with an RPi controller.

Update: as you can see from the new site picture, I have been able to setup the RPi cluster along with some cheap ($6.99) USB to Ethernet adapters.  Now the fun begins!

Monday, December 21, 2015

Learning BGP - Thinking of adding a number of RPi BGP routers to the network

I have been toying with a way of cross-pollinating the packets on my home network.  Right now I am at a quandary on how to allow computers on my Media VLAN to talk to the printer on the Pers VLAN.  It is an interesting problem and one that strangely enough has something to do with two projects that I am working on at work.  I want to explore how to route information from one network to another given that the subnet on each end of the gateway have the same ip addresses, but yet must remain different.  I think the key to this something approaching the BGP protocol perhaps with some gateway translation in the middle.  More later.

Thursday, December 10, 2015

CC #7 - Finally settled on a partial solution

I modified the FIOS TV setup - I now have reduced the Extreme package down to the Custom TV package.  In addition, I have dumped the FIOS DVR and STB rental for a TiVo Bolt and 2 TiVo Minis.  The Bolt serves as the DVR in my setup and the two Minis are able to stream the shows and set the tuners (4 on the Bolt vs. 2 on the FIOS DVR) to stream TV.  The entire setup is running on Ethernet (the Media VLAN) through my house.  This is actually predicted to run about $70 per month less than my current Verizon bill.  I also went from 25/25 to 50/50 on the internet.

Update: I have had a chance to get a couple of bills since I posted this.  The difference between what I was paying and what I am paying now amounts to about $80 since my bill was over $200 per month.  So I am reasonably happy now with the new setup - and the wife seems to be happy as well.  I'm not missing paying the Sports Fee every month.

Saturday, November 14, 2015

SynthBoost Project #4 - Flow Through Experiment

As I try and look through what I will be doing, it might be nice to get a general flow through experiment up and going. What I envision is to have all of the vintage gear hooked into the 4x4 midi interface, then through the powered usb hub, through the RPi, and then in turn hook it to the iPad. The RPi would provide a number of virtual midi connections to the iPad. Each of the vintage gear would be tethered through the RPi and the virtual connections. This would form the baseline and could be used to measure overall lag through the setup.